|
| ||
Repair iPod EarbudsHow To | ||
| When the left channel audio of my wife's iPod-Touch became intermittent, I feared the worst. Sure enough, wiggling the wire next to the plug made the sound go on and off. I cut off the plug to inspect the wires. They were VERY fine indeed. In fact they look suspiciously like LITZ wire - very flexible but notoriously difficult to solder. | ||
|
| ||
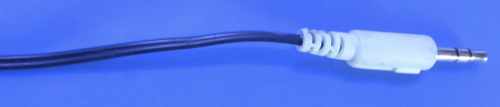
| However, I decided to have a go but I wasn't going to attempt to solder the wires inside a new plug. Instead, I found a really cheap set of earphones and cut the plug off that, a few inches from the plug itself. | ||
|
| ||
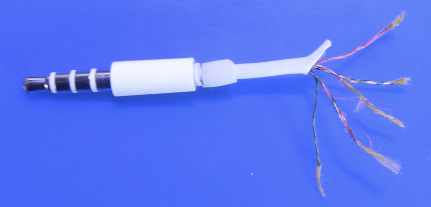
| I used black cable for this example to make it easier to distinguish from the white but I recommend using white if you have it. Note that this plug has only three connections - "tip", "ring" and "sleeve". That's all you need since there's no microphone. | ||
|
| ||
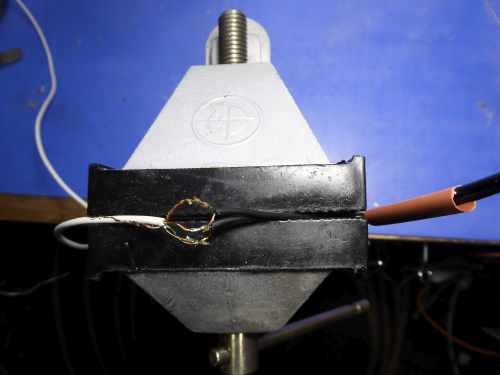
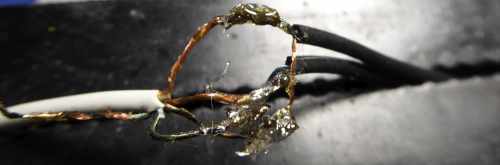
| I held the original iPod earbud cable gently in a vice, applied flux to the stripped ends and then tinned them with solder. The result looks a mess under the magnifier because there's a mixture of melted plastic "hairs" and flux on the ends. But the tinned sections are a few millimetres in from the ends. I tinned the wires of the black cable, too, and fed a piece of heatshrink tubing onto it. Then I held both cables, gently, in the vice (which has plastic jaws). | ||
|
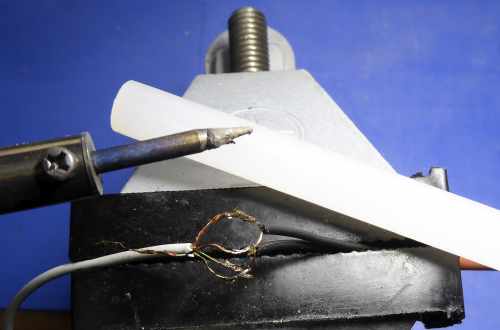
| You can see the red heathshrink tubing at the right. I used tweezers and a hot-tip soldering iton (430°C) to solder corresponding wires together (see below)*. | |
| At this stage I tested the earbuds to ensure that they worked reliably. | ||
|
| I used a glue-stick with another soldering iron set to a lower temperature (about 150°C) by unplugging it before it became too hot. Note the extra wire, which isn't connected. It can be snipped off. | |
|
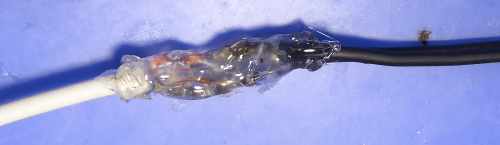
| The hot-melt adhesive was applied to the individual wires as an insulator. | |
| Again I tested the earbuds to ensure that they worked reliably. | ||
|
| The wires were squeezed together, using light finger pressure, and more glue applied. | |
|
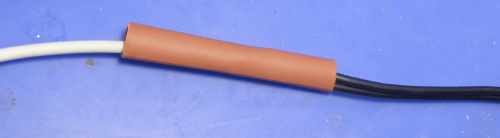
| The heatshrink sleeving was pushed over the top of the joint, once the glue had cooled. | |
|
| I used a paint-stripper hot air gun to shrink the sleeving and further melt the adhesive slightly. | |
| It's possible to shrink it by placing the barrel of the soldering iron against the sleeving or by lowering the tubing, carefully, over the flame of a cigarette lighter. | ||
|
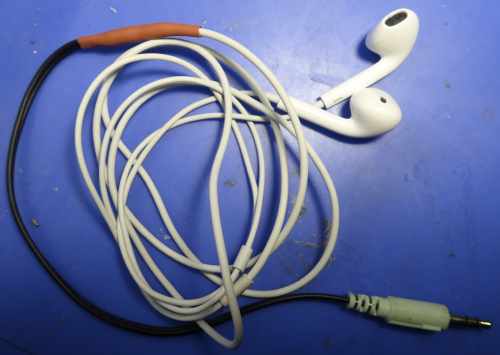
| The final result isn't very aesthetic but it works! (Use white cable and heatshrink for more eye-pleasing results.) | |
| * Knowing WHICH wires to solder together is the problem! Firstly, you need to know that the tip of the plug is LEFT channel and the adjacent ring is RIGHT channel. So, once you have bared and tinned the (black in my case) plug wires, use a multimeter or a battery and LED to determine which wire is connected to the plug tip (L) and which to the ring (R). The copper-coloured wires are the corresponding "common" (screen) connections. In the case of the original iPod earbuds, the tip (L) wire is coloured green and its corresponding screen wire is striped green. The ring wire (R) is coloured red and its corresponding screen wire is striped red. There is a fifth wire striped red & green - probably for the non-existent microphone - which can be snipped off and discarded. With grateful thanks for the plug pinout guide at Also see cheap earphone repair | ||
| Send this page address - CLICK HERE - to a friend ! | ||