| 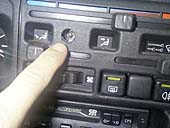
| Knowing what a pain it is to get at the central bulb for the heater controls, I decided to drill the panel instead. Here is the culprit! Unfortunately, although it's possible to glue a matchstick to the bulb with fast setting epoxy and pull it out, pushing the new one in is impossible because the bulb-holder simply disappears backwards. There's absolutely nothing to hold it in! OK, so now I have a nice hole to hide AND I have to remove the panel :o( |
| 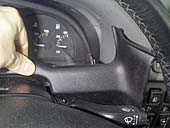
| Start by pulling the odometer zero button off, otherwise it gets in the way. This moulded trim below the instrument pod can be unclipped with the aid of a screwdriver and pulled out. A great deal of force is required but be CAREFUL. If you think that was tricky, wait till you have to replace it ;o) |
| 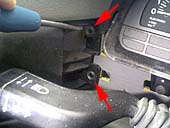
| Removal of that trim exposes the two right hand screws that hold the heater control panel. Take out the screws with a #1 Pozidriv screwdriver. |
| 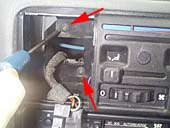
| The left hand screws are hidden by the clock (or trip computer). This simply unclips if you poke a flat screwdriver blade behind it. Remove these two screws and you will be able to puill the heater control panel out about 25mm. |
| 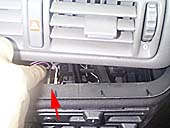
| See those purple wires? They are attached to the bulb holder. Push the control lever to the right then grip the purple wires and gently ease the bulb holder towards the engine until you can see the bulb. Long-nose pliers are helpful. Fit a new bulb then replace the assembly. Now for the fun of putting it all back together. I did the whole job in about half an hour, assisted by much cursing and only a small loss of blood. |
| When scrapping my last Cav I removed the glove box to strip the alarm out (decided with the rats nest behind there that it wasn't a good idea after all). With the glovebox out there seems (not actually tried it) enough space to get an arm behind the heater control panel and, if you remove the clock, you should be able to see what you're doing. Perhaps someone out there could try this when they inevitably need to replace the little flicker. Mike Dodd |
| 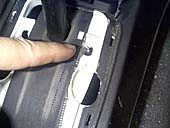
| I didn't really notice that the gear numbers were not illuminated until my wife complained. She's much happier with a manual gearbox. An automatic is "much too complicated!" The cover at the base of the gear shift is simply clipped in place. Pull it upwards and tie it out of the way at the top of the lever. There's only one bulb and it's not difficult to pull out. Unfortunately, just like the heater control bulb, when you try to push a new bulb into the socket, it pops down and out of sight! |
| 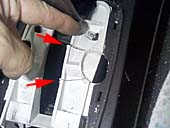
| My solution was to make two cuts (arrowed) with a hacksaw blade (more blood). Removal of that piece of plastic left just enough room for me to get two fingers inside to replace the bulb holder and to hold it while I inserted the bulb. The plastic had to be replaced and held with very sticky foam adhesive tape because it acts as a reflector, without which you will not see the numbers "1" and "2". Don't you just love the way they designed this car for ease of maintenance?
Want to know what the dealer charges to replace these 10p bulbs? ;o) |
| Dear Martin, I'd like to offer an extra wrinkle to your Cavalier heater panel lamp replacement saga - to increase the time between failures ! I noticed from the wiring diagram that whenever the engine is running the light is always on ! This was proven to be correct. So, the 2nd time that I had to replace the lamp I chopped the live supply & took it from the clock lamp feed. This way the heater panel lamp only fires up when the side-lights are on. Hey presto. Another mod of mine - to easily check that the timing belt tension is OK on those with the auto tensioner.Whilst replacing the belt - Drill a 12 mm (1/2" in old money !)hole in the correct place in the timing belt cover & view straight in without any aggro. Afterwards fill with a 1/2" grommet. Currently got the engine man. light saga @ 80K miles & 12 yrs on ! Cheers Ron Taylor 1.6 GLS Hatch Send this page address - CLICK HERE - to a friend ! |
| | Return to car page |

