AppleWorks is a great little program that does many things. It's rather like Microsoft Works in that it combines Word Processing, Spreadsheet, Database, Drawing and Painting all in one integrated program. It will run on any Mac running OS9.2.2 to OS10.4 (but not Intel).
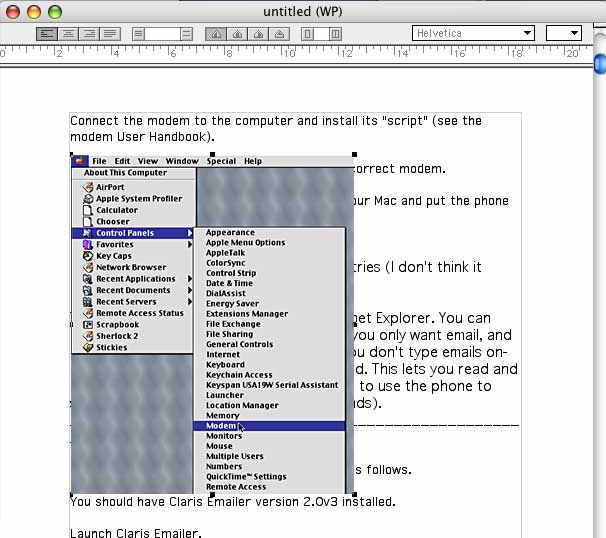
One of the most frequently asked questions is "How do I insert an image so that the text flows around it?" Here's an example. First, make sure the image size is correct. (I usually set the image resolution to 72 pixels per inch if it's not for printing or 200 ppi if it is. Save it in a form that AppleWorks can handle - such as PICT). Display the page where you want to insert the image. Click on the arrow tool in the left column.
Now click on the File menu and scroll down to Insert. Select that. 
A new "navigation" window will open. Use it to navigate to your image folder. At bottom left make sure that the File Format is set to "All Available". You can now click on your desired image filename (modem_setup.pct in this example). Then click on "Insert".

The image will be deposited at a random position on the page, hiding the text. Drag it to the desired position.

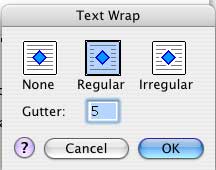
Now, with the image still selected (see the little black squares) click on "Options" in the menu bar and select "Text Wrap".

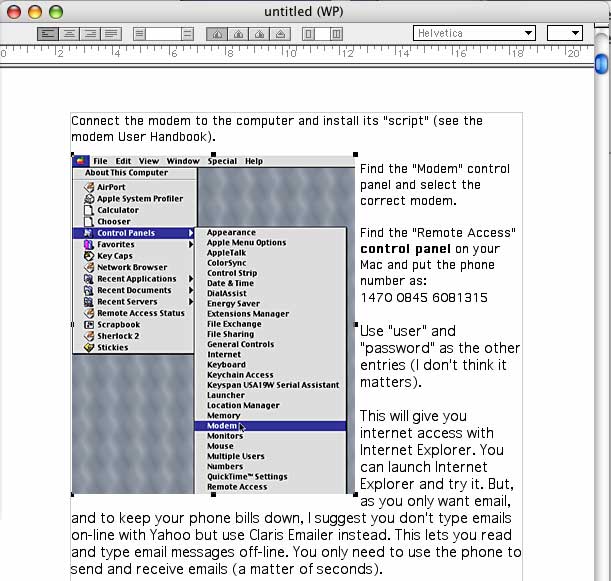
Set the text wrap to "Regular" (unless the image is not rectangular, in which case you may prefer to select "Irregular") and click "OK".

The text will now wrap around the image, as required.

Easy when you know how!
Send this page address - CLICK HERE - to a friend !
Copyright ©2007 Glodark
Updated May 8, 2007
This file may be downloaded for private and personal use but NO part of it may be published in any form without the prior permission of the author.
This Web Site was produced entirely on a Macintosh computer


